Add a pilaster or lintel
Thicken part of a panel — a pilaster rising from the base, or a lintel over an opening.
A pilaster is a thickening of the panel wall that extends up from the bottom of the panel. A lintel (corbel) is a thickening placed above the panel base — typically over or under an opening. Both are defined the same way, one row per section, in the same dialog; whether a row is a pilaster or a lintel is simply a matter of where you place it.
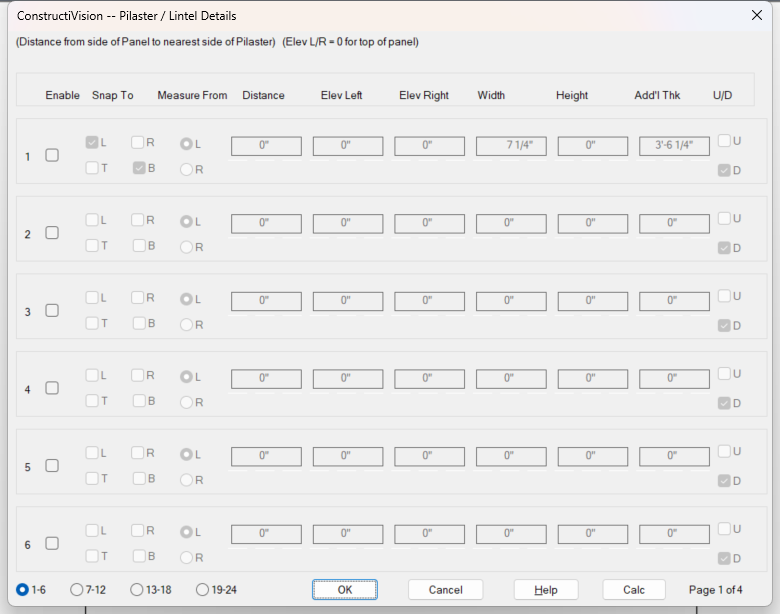
The Pilaster / Lintel Details dialog, shown with the sample building’s data.
Steps
Open Pilaster / Lintel for the panel — from the toolbar, or from the Main Panel Details feature checklist.
Enable a row. Its fields activate.
Set the row’s values:
Field
What it sets
Enable
Draws this section. A disabled row keeps its values without drawing — useful for staging sections in a template panel.
Snap To (L / R / T / B)
Registers the section against a panel edge. Snapping to any edge derives the position for you, so Measure From, Distance, and the elevations grey out. Snapping to both T and B spans the full panel height, so Height greys out too.
Measure From (L / R)
Which side of the panel the Distance is measured from.
Distance
From the chosen panel side to the nearest side of the section.
Elev Left / Elev Right
Elevation of the section’s left and right ends. Leave 0 for the top of the panel.
Width
Horizontal size. A value of 0 extends the section to the other edge of the panel.
Height
Vertical size. A value of 0 extends the section the full height of the panel.
Add’l Thk
Additional thickness beyond the panel face. The section’s total thickness is the panel thickness plus this value — e.g. 3 1/2” entered on an 8 1/2” panel gives a 12” pilaster.
U / D
Which panel face the section projects from — Up (the top face as the panel lies in the casting bed) or Down (the face cast against the form).
Add more rows if needed — the dialog holds 24 sections, shown six at a time; switch pages with the 1-6 / 7-12 / 13-18 / 19-24 selector at the bottom.
Confirm. The feature’s master toggle turns on automatically once at least one row is enabled.
Redraw the panel. Each enabled section is drawn as a thickened outline at its combined depth (panel thickness plus Add’l Thk), shaded, and dimensioned; if the panel’s chamfer option is on, the section’s edges are chamfered to match.
Notes
Edge-snapped sections are drawn at casting width. A section snapped to the left or right edge has the panel’s edge gap deducted from its drawn width, so it lines up flush with openings that share that edge.
Openings stay clear. The shaded thickened area is clipped around any opening that falls inside it — the opening is not shaded over.
Other features adjust around the section. Ledgers that cross a pilaster or lintel are either trimmed from it or segmented onto its surface — chosen in the Ledger / Top Plate dialog (see Add a ledger and top plate). Weld connections placed on a panel face (U or D) are adjusted to the section’s surface.
Sloped panel tops. A section snapped to a sloped panel top follows the slope; its longest vertical edge is the specified height.
Full-width base thickening. Set both Distance and Width to 0 and set Height to the change elevation to make a panel thicker at its bottom than its top.
Negative values are accepted for special cases — e.g. a negative Distance starts the section outside the panel edge, for a projecting haunch or an interlocking panel.